Trimming Your Dog's Nails Safely
Understanding the Importance of Trimming
Regular nail maintenance plays a vital role in your dog's comfort and mobility. Overgrown nails can lead to painful pressure on paw pads and even alter your dog's gait. When nails extend too far, they force the toes to twist sideways, creating unnecessary strain on joints and tendons. This can eventually contribute to arthritis or other musculoskeletal issues. Many owners don't realize that proper nail care directly impacts their pet's quality of life from puppyhood through senior years.
Beyond physical discomfort, neglected nails present several practical problems. They frequently snag on fabrics, sometimes tearing completely and leaving open wounds. In extreme cases, uncut nails may curl backward and embed themselves in the paw pads, requiring surgical intervention. Regular trimming sessions prevent these traumatic incidents while keeping your companion active and pain-free.
Gathering the Necessary Tools and Supplies
Quality equipment makes all the difference in nail care. For small to medium breeds, scissor-style clippers often work best, while larger dogs may need guillotine-style cutters. The market offers specialized designs like rotary grinders for anxious pets or those with thick nails. Always select tools that feel comfortable in your hand - shaky equipment leads to mistakes. Keep clotting agents like styptic powder within reach, along with cotton swabs for precise application when needed.
Before the first cut, practice handling the tools. Test their mechanism to ensure smooth operation and familiarize yourself with safety features. Some clippers include quick sensors or protective guards - understand how these function. This preparation builds confidence and allows you to focus entirely on your dog during the actual trimming session.
Preparing Your Dog for the Procedure
Successful nail care begins with trust-building exercises. Start by gently massaging your dog's paws during cuddle sessions, gradually increasing pressure to simulate trimming motions. Introduce the clippers slowly - let your pet sniff them while offering high-value treats. Positive associations transform nail care from stressful to routine. For particularly resistant dogs, try rubbing the closed clippers against their nails before attempting cuts.
Choose a calm environment with good lighting and minimal distractions. Position yourself comfortably where you can easily access all paws. Some dogs relax when lying on their side, while others prefer sitting between the owner's legs. Observe your pet's body language closely - panting, trembling, or whale eye (showing the whites of eyes) indicate rising stress levels that may require a break.
The Trimming Technique Step-by-Step
With your dog settled, lift one paw gently but firmly. Identify the translucent nail tip - this is the safe cutting zone. The pinkish quick contains blood vessels, so always leave 2-3mm buffer space when cutting. Make swift, decisive cuts at a 45-degree angle, following the nail's natural curve. Dark nails pose more challenge; look for a chalky white ring inside the nail as your guide, or trim tiny slivers until seeing a dark dot marking the quick's approach.
Work systematically: front paws first (which typically grow faster), then rear. Don't forget the dewclaws if present. Between paws, offer praise and small treats to maintain positive momentum. If your dog becomes restless, complete one paw per session rather than forcing completion. Consistency matters more than perfection in early training stages.
Troubleshooting and Post-Trimming Care
Accidental quick cuts happen to every owner eventually. When they occur, stay calm - your reaction influences your dog's. Immediately apply styptic powder with gentle pressure for 30-60 seconds. If bleeding persists after two minutes, contact your vet. Post-trim, check for sharp edges that might catch on surfaces; these can be smoothed with a nail file or emery board.
Monitor your dog's movement afterward - slight limping might indicate a too-short trim requiring shorter future sessions. Conversely, clicking sounds on hard floors suggest remaining length needing attention. Always conclude with affectionate praise and a special treat, reinforcing that nail care concludes with positive outcomes.
Handling Potential Issues and Preventing Accidents
Nail Trimming Safety Precautions
Safety begins with mindfulness - never trim when rushed or distracted. Create a checklist: sharp tools, good lighting, clotting agents, and treats. Position clippers perpendicular to the nail to prevent splintering. For particularly resistant dogs, consider the burrito method - wrapping them snugly in a towel with one paw exposed at a time. This minimizes sudden movements while keeping everyone safe.
Learn to recognize your dog's stress signals before they escalate. Lip licking, yawning, or tense muscles often precede more dramatic reactions. If these appear, pause for calming pets or a short play break. Some owners find success playing white noise or soft music to mask the clipping sound. Remember - forcing restraint typically increases anxiety for future sessions.
Identifying and Addressing Potential Issues
Fear-based resistance requires patience and creativity. Try associating the clippers with mealtime - place them near the food bowl without use. Progress to holding tools while feeding, then touching paws during meals. This counterconditioning gradually rebuilds positive associations. For dogs traumatized by past experiences, consider cooperative care training where they learn to present paws voluntarily.
Black nails demand extra caution. Shine a flashlight beneath the nail to highlight the quick's outline, or trim minuscule amounts weekly rather than larger portions monthly. Some groomers recommend marking safe cutting points with a white pencil when visible. If uncertain, professional guidance provides valuable technique demonstrations tailored to your dog's needs.
Choosing the Right Tools and Techniques
Tool selection should match both the dog's size and the owner's dexterity. Arthritic handlers might prefer ergonomic clippers with cushioned grips. For thick-nailed breeds like German Shepherds, bypass-style cutters prevent crushing. Rotary grinders offer precision but require acclimation - first introduce the sound while offering treats, then progress to brief touches against nails with the tool powered off.
Alternative methods exist for extreme cases. Scratch boards teach dogs to file their own nails by scratching sandpaper-covered surfaces. Some veterinary offices provide sedation options for profoundly fearful pets. Always consult professionals when standard approaches prove ineffective - they can identify underlying issues like joint pain making paw handling uncomfortable.
Preventing Accidents and Post-Trimming Care
Consistent maintenance prevents most emergencies. Aim for bi-weekly inspections with monthly trims as a baseline, adjusting for individual growth rates. Dogs walking primarily on pavement may need less frequent clipping than those on soft surfaces. Establish a routine - same location, tools, and reward system each session to build familiarity.
Post-trim, check between toes for trapped clippings that could irritate. Offer water and a potty break, as some dogs hold themselves tense during the process. If using grinders, wipe paws with a damp cloth to remove dust. Note any abnormalities like cracked nails or swollen toes for veterinary evaluation. With time and positive reinforcement, most dogs accept nail care as just another bonding activity with their favorite human.
Tips for Preventing Future Nail Problems
Proper Nail Trimming Technique
Preventative care starts with mastering the fundamentals. Always trim in well-lit areas to clearly see nail structures. For curved nails, make several small cuts following the natural arc rather than one straight chop. This prevents splitting. After clipping, run your finger along the edge - if it catches your skin, it'll catch carpets too. A quick file prevents household damage and snags.
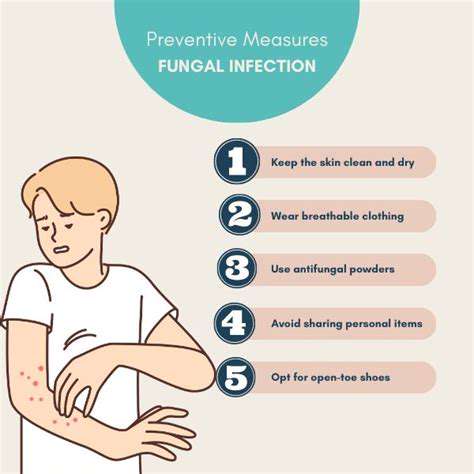
Develop an inspection routine during cuddle sessions. Regularly check for cracks, peeling, or unusual thickening that might indicate nutritional deficiencies or fungal infections. Note any changes in nail growth patterns - sudden acceleration could signal metabolic issues. These observations help catch problems before they require invasive treatments.
Understanding the Dog's Nail Structure
Canine nails consist of multiple layers. The outer keratin sheath protects the sensitive quick housing nerves and blood supply. As nails grow, the quick elongates too. Frequent trims actually train the quick to recede, allowing shorter nails over time. This explains why neglected nails often seem impossible to shorten sufficiently in one session - the quick has grown close to the tip.
Different breeds show distinct nail characteristics. Sighthounds typically have tighter, more compact quicks while retrievers often sport spongier nail beds. Working dogs develop thicker keratin from constant digging or climbing. Understanding these variations helps tailor your approach - for instance, dense nails may require pre-softening with warm water soaks before trimming.
Choosing the Right Tools and Supplies
Invest in a complete nail care kit: multiple clipper sizes for different nails on the same dog, a diamond-coated file for smoothing, and quick-stop products in both powder and pencil forms. Rotating tools prevents overuse wear - have backup clippers when primary ones dull. Store equipment in an easily accessible but dog-proof location to maintain consistency.
Consider supplementary products like paw balms for post-trim moisture, especially in dry climates. Non-slip mats provide stability during sessions for wiggly pups. For multi-dog households, assign color-coded tools to prevent cross-contamination between pets. These small investments pay dividends in safety and efficiency over time.
Creating a Positive Experience
Transform nail care into quality time. Develop a special ritual like spa day with gentle massage, brushing, and treats throughout. Some owners use lick mats smeared with peanut butter during trimming to create pleasant distraction. The goal is association - nails equal attention and rewards rather than stress. Even imperfect sessions should conclude positively.
Track progress in a journal - note which techniques worked, tools preferred, and reactions to different approaches. Over time, these records reveal patterns helping refine your method. Celebrate milestones like a full session without resistance. With patience and consistency, most dogs learn to tolerate and even enjoy this essential grooming aspect.
Read more about Trimming Your Dog's Nails Safely


Hot Recommendations
- Best Pet Bowls: Stainless Steel and Ceramic
- Pet Hydration: Why It's Crucial
- Stop Counter Surfing: Training Your Dog to Stay Off
- Pet Hypothyroidism: Symptoms and Management
- Signs of Pet Liver Disease: What to Watch For
- Pet Emergency Kits: What to Pack
- Dangers of Xylitol: Toxic to Dogs
- Dealing with Pet Diarrhea: When to See a Vet
- Preparing Pets for Travel: Tips for a Smooth Trip
- Pet Depression: Recognizing the Signs